User Tools
Table of Contents
Elasticity of Glass
Description
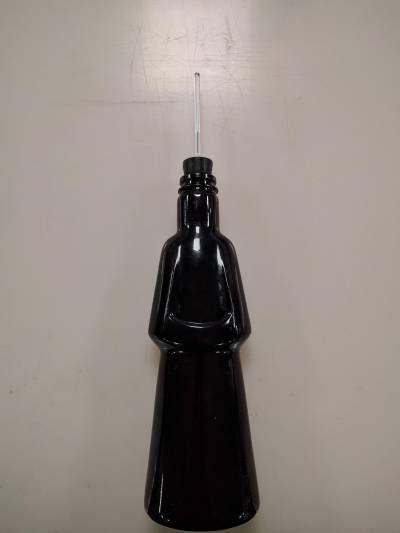
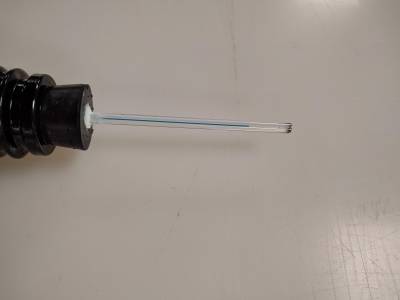
This demonstration consists of a glass bottle filled with water that's been dyed dark blue. The top of the bottle is stopped with a rubber stopper, and a glass capillary tube (formerly part of a thermometer) is stuck into the stopper.
Purpose
This demonstration shows the elasticity of a material usually thought of as brittle and inflexible. Demonstrates the measurable strain produced in glass as a result of force exerted by squeezing the bottle.
Apparatus
- Bottle with capillary tube and strongly dyed water
- Water and an eye dropper (if necessary)
Setup
- First you should check that the water level is correct. Ideally when running the demonstration the level of the water should be approximately halfway up the capillary.
- If the water level is too high, squeeze the flat sides of the bottle together until the excess water beads up at the top of the capillary tube. Use a tissue to absorb the excess, repeating if necessary.
- If the water level is too low (or not visible at all) things get a bit more difficult. Squeeze the flat sides of the bottle together and use the eye dropper to place a droplet of water on the end of the capillary tube.1) Release it, and then squeeze the high sides of the bottle together to draw the water in further. Repeat if necessary.2)
- If any bubbles developed, squeeze the bottle until they are pushed out the top.
- Once the water level is at desired level, the demonstration can be shown. By squeezing the flat sides of the bottle together, you'll decrease the internal volume of the bottle and can thus raise the water level. By squeezing the raised sides of the bottle (perpendicular to before) you can increase the volume of the bottle and lower the water level.
Notes
This demonstration can be finicky at times, you may notice that the water level will increase even as you hold it.
Only a very small change in the volume of the liquid is necessary to produce a substantial change in the height of the liquid in the capillary tube, so it's very sensitive to the environment. This effectively means that, in addition to providing an effective reading of the small changes in volume of the bottle, it's also an effective thermometer and barometer.
The bottle has an internal volume of 375ml, and the visible part of the capillary tube has a length of 7.5cm and an internal diameter of 0.3mm. (somewhere between 0.25mm and 0.5mm, this is a guess.) This means that to go between the capillary being empty and the capillary being full, there must be a reduction of the bottles volume of 5.3 microliters, or a change of 0.00141%.
If you do some math, you'll find that to achieve a similar change via expansion due to heating an increase in temperature of only 0.068ºC is required.3)
Demo room information
| Location | —- |
| Maker | Unknown |
| Current State | Working |


